Showing posts with label Baby. Show all posts

Sunday, September 22, 2013

Sun Flower Hat - Free Crochet Pattern

Sun Flower Hat by Dana White - Everyday Handmade - Made for Patty G's Twin Baby Girls I can't wait to see.

Hat

You can use any basic hat pattern you like. This is my go to pattern I picked up over the years. I never figure out gauge, I just crochet, and if it looks too big or too small, I start again. Always someone I can give a hat too.


Round 1: Start with a Magic Ring. Double Crochet [DC] 8 times into the center of this ring. Pull tight, Slip Stitch [SS] into first DC, place a stitch marker here. Chain 1.
Round 2: DC into the same stitch, 2 DC into each stitch all the way around. SS into first DC move stitch marker. Chain 1 [16 stitches]
Round 3: DC into the same stitch, 1 DC in next stitch, (2 DC in next stitch, 1 DC in next stitch) repeat around. SS in first DC, move stitch marker. Chain 1 [24 stitches]
Round 4: DC into the same stitch, 1 DC in the next 2 stitches, (2 DC in next stitch, 1 DC in next two stitches) repeat around. SS in first DC, move stitch marker. Chain 1 [32 stitches]
Round 5: DC into the same stitch, 1 DC in the next 3 stitches, (2 DC in next stitch, 1 DC in next three stitches) repeat around. SS in first DC, move stitch marker. Chain 1 [40 stitches]
Round 6: DC into the same stitch, 1 DC in the next 4 stitches, (2 DC in next stitch, 1 DC in next four stitches) repeat around. SS in first DC, move stitch marker. Chain 1 [48 stitches]
Round 7-12: DC into each stitch all the way around. SS into first DC, move stitch marker. Chain 1 [48 stitches] Last row fasten off. Weave in ends.


Sunflower

I was inspired by this pattern from CoatsCraft. No specific gauge is needed. I used an acrylic yarn for the center, and a cotton yarn for the petals. The cotton gives the petals a little more structure.


BROWN YARN - CENTER of FLOWER:
Chain two
Round 1: 6 Single Crochets [SC] into the first chain, SS into the first SC to complete. Place a stitch marker here. Chain one to bring you up to next round. 6 stitches
Round 2: SC into the same stitch and 2 SC in each stitch all the way around, until you get to the end of round, and finish with a slip stitch, move your stitch marker here. 12 stitches.
Round 3: 1 SC in the same stitch and 1 SC in the next stitch (2 SC in next stitch, 1 SC in next stitch) repeat to end of round, finish with a slip stitch, and fasten off, leave long tail to sew into hat. 18 stitches.


YELLOW YARN - PETALS:
Round 4: Attach yellow yarn with a single crochet, (chain 9, SC in 2nd chain from hook, HDC in next chain, DC in next chain, 1 TR into each of the next 2 chains, DC in next chain, HDC in next chain, SC in in the last chain, and SS into the first SC that started this petal. SC in next brown SC) repeat 17 more times. (on last petal, SS into the first petal you created and fasten off) You will have 18 petals when finished. Leave long tail to sew into hat.


Leaf


Chain 12, SS into 2nd chain from the hook, and in all chains. Chain 1 and turn.


HDC in first stitch, DC in next two stitches, TR in next three stitches, DC in next Two Stitches, HDC in next two stitches, SC in next stitch, SS in next stitch, chain 2, [turn and go back down other side of or original chain] SS in first stitch, SC in next stitch, HDC in next two stitches, DC in next two stitches, TR in next three stitches, DC in next two stitches, HDC in last stitch, and fasten off. Leave long tail to sew into hat.

I wrote this pattern up from memory, as I gave the hats as gifts this weekend. So if you see an errors in my written pattern, let me know and I'll update the pattern as needed.

Thursday, February 9, 2012

Water Bottle Baby / Toddler Toy

My little one year old girl loves to play with water bottles. Always taking them, and me worrying she is going to get the top off and choke. She doesn't think they are very much fun with out the cap, they just go flat. So today she and I made her a new toy. We took the label off the water bottle, filled with tap water and left about 1 1/2 inches of air at the top. We have this ice cream bucket of mismatch beads my son bought at a garage sale (all by himself at age 4) for a buck. Two years later it is still almost full. So my little girl and I put the beads in the bottle until the water was right up to the top. She decided it was also really fun to take hand fulls of beads and shake her hands, so we had a few hundred beads to clean up, but at least she did help pick them back up too. Anyway, when we got the bottle full, I took some super glue and glued the cap back on. Now she can play with a really pretty water bottle, and I don't have to worry she will choke.

I did have to tell her, "No, no, no, that's mine." That made the bottle even more fun.

Saturday, June 18, 2011

Butterfly Hat Pattern for sale to raise donations for Relay for Life


I have pattern sizes for hats Preemie to 24 months. To purchase a hat pattern please click on the following link Relay for Life or click on the Relay for Life button in the top right corner of this blog. Donate $5 to my dad's site in honor of my sister Leslie Schuldt. Then follow up with an email to me dana@schuldt.org and let me know you donated to purchase a pattern. Please be sure to email me with the same email address you used to make the donation with "BUTTERFLY HAT" in the subject line. After I confirm the donation I will email you a pdf file of the pattern. You can email me also with any questions you may have on the pattern.
Hat by pattern tester Marta
Photos on How to knit the Butterfly stitch click here.
To take a look at my other posts about the Butterfly hat click here

Monday, May 30, 2011

Butterfly Pattern Tester Photos

Hat by Tester Marcy

Hat by Tester RedStar

 
Hat by Tester Debbie

Hat by Tester Jackie


Hat by Tester Marta


I also wanted to send out a special Thank you To Marta for donating to our Relay for Life, raising money for the Hope to find a Cure, the reason I am designing this pattern in the first place. To donate you can click on the link in the upper right corner of my blog which will take you directly to the the Relay for Life website. Donating directly you will receive an emailed form so you can deduct from your taxes if you itemize and live in the USA anyway. If you donate $10 or more you are also purchasing a Luminaria which will Honor a loved one who has in the past or is battling cancer, or In Memory of a loved one who has lost their battle against cancer. You can enter their name in the Fundraising Honor Roll or in the message. Your loved ones name will go on a illuminated bag which will glow all night through the walk. Once I get this pattern ready, I will try my hand at selling it on the Ravelry site but I believe a percentage of the money will then go to paypal, or you can donate directly on the Relay for Life site.
If you donate as your way of purchasing this pattern please follow up using the same email address as you used to donate and email me at dana@schuldt.org. Once I confirm your donation I will email you a pdf file of the pattern. As we speak I believe I have preemie through 6 month size hat pattern ready.
 I would also like to share one more thing, Marta also had a cute idea to make the butterflies look... well more like butterflies.
She weaved in Red Heart Tiki decorative yarn, through each butterfly stitch and tied off on the inside behind each stitch. So cute! If you see this post Marta and have any tips or tricks please post a comment.

Thanks to all my wonderful testers I should have the pattern available soon.


Butterfly Knit Hat Pattern is almost ready

I've gotten most of the pattern testers replies back. I'm working on adjusting sizes for larger and smaller hats. I wanted to share a site I found extremely helpful to figure out sizes. This comes in real handy when you don't have a little one of your own the right size to test model.

Bev's Country Cottage

Bev lists head sizes by age in inches and centimeters, also give approximate height hats should be. If you scroll down on the pages she lists measurements for lots of other stuff too.

Sunday, May 15, 2011

Butterfly Knit Hat


I designed and knit this cute Butterfly Hat for my darling little girl. First knit pattern I've designed and would like a few people to test my pattern and give me some feed back. The pattern fits approximately 6 months old infants. If I have enough interest I may work up patterns for other size as well.


Butterfly Hat – infant size 6 months
US size 10, 6mm 16” circle needle ~ gauge 15 stitches & 21 rows = 4”
unstretched 15” circumference x 5.5” height (edge naturally rolled)
I used Caron Simply Soft yarn, but any worsted weight yarn should work fine as long as it is a solid color so the decorative stitch will show up.

If you are interested in being a pattern tester for me. Please post in the comments as well as email at dana@schuldt.org and put "Butterfly Hat Tester" in the subject line. I will email the first 10 interested people a pdf file of the pattern. Please post in the comments if you are interested in a different size, and if the interest is high enough I will figure out a pattern for other sizes as well. You can email me for any questions or advice and I will try and get back to you as soon as possible. In exchange for this free pattern I ask that you have the hat completed in two weeks, followed by emailing me feed back and photos with your permission to post them on my blog. I would also appreciate your photos linked to the Ravelry page as well if you are a member.

Thanks and happy knitting!

As of 5-17-10 all test knitters are hard at work. Thanks everyone. I'll post pictures when I get them back. You can still post comments on other sizes of hats that you may be interested in, if this test knitting process goes well. Thanks for all the support and compliments I've received. Dana

5-30-11 some photos are in ~ click: Butterfly Hat Tester Photos

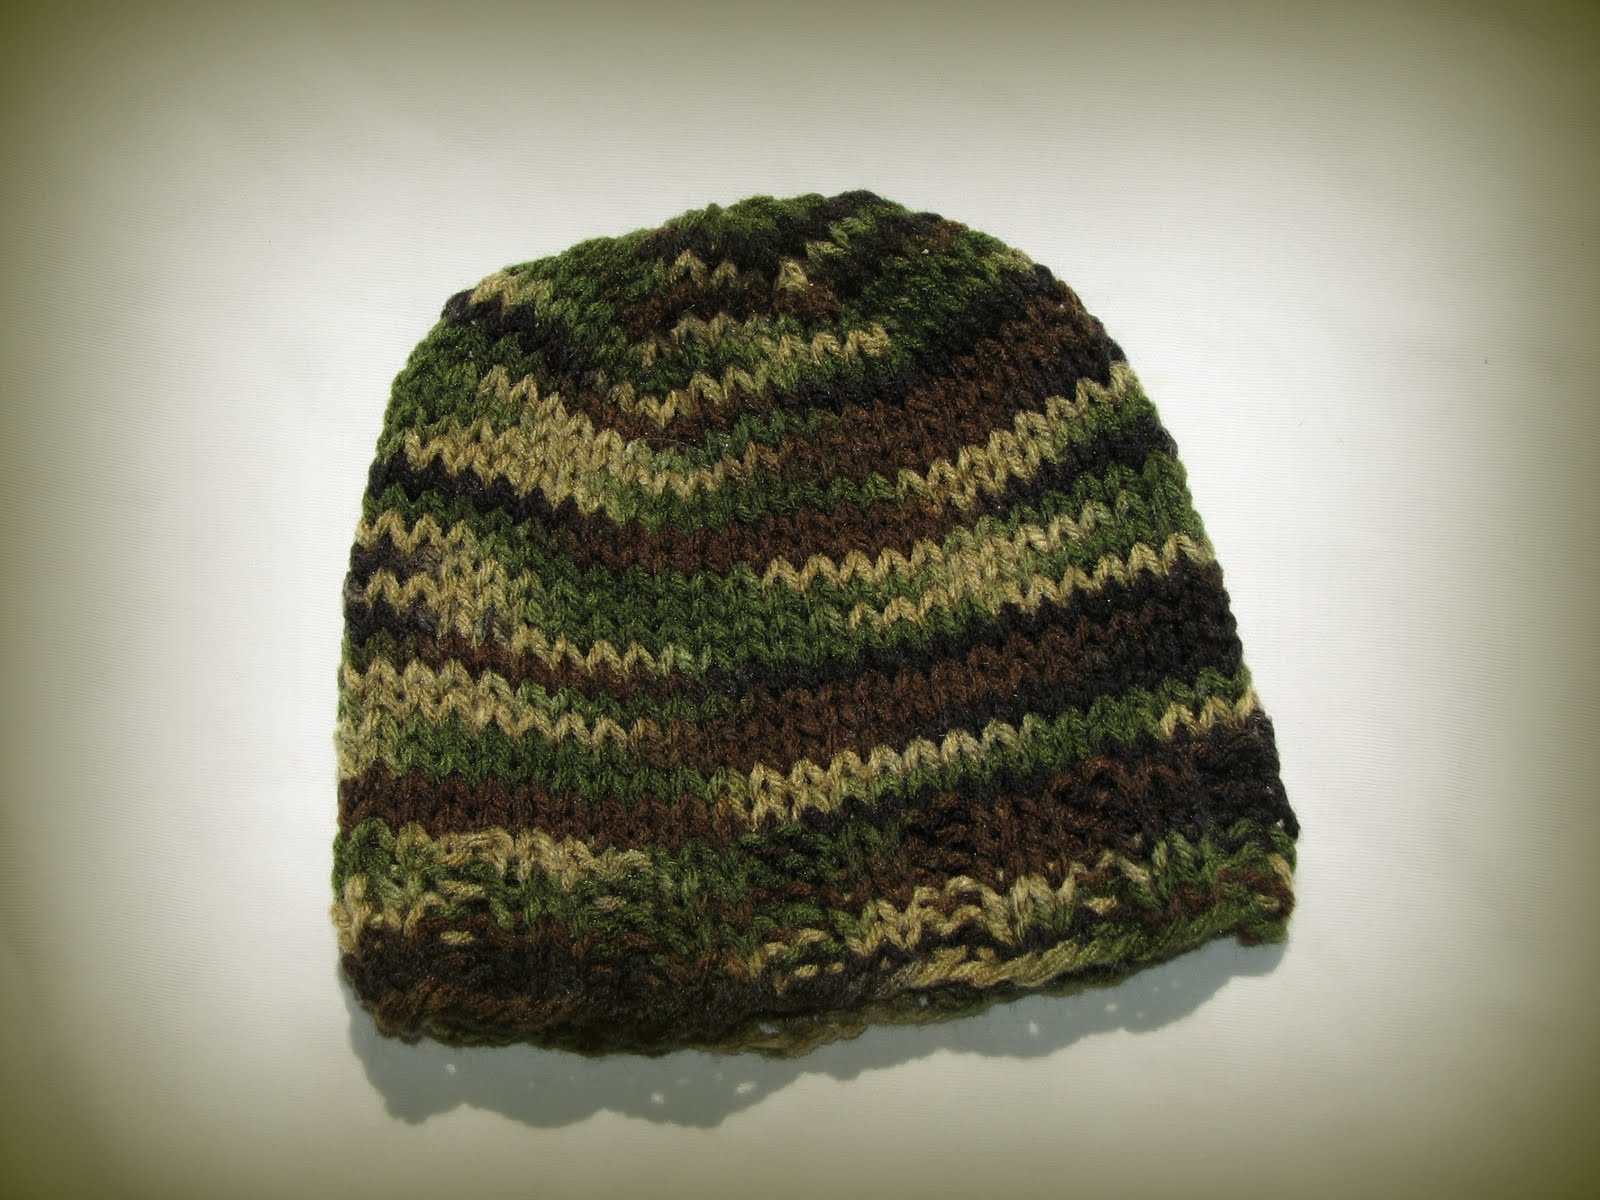
Basic Knit Infant Hat

Just a quick note before we get to the pattern. I just wanted to let everyone know that I am fund raising for Relay for Life, Hope to find a Cure for Cancer. I have a Butterfly Hat pattern I am selling just for this cause. Please check out the link in the upper right corner of my blog to read our story and donate if you can. Thanks!

Basic Knit Infant Hat ~ Size 3 months
Over all size with out stretching 13" circumference 5.5" high
US size 10, 6mm circular needle 16" ~ Gage 7 stitches = 2"
I used Red Heart Camouflage 0971
Using this large of a needle makes for a very stretchy, lighter hat for the spring and fall.

Cast on 48 stitches, place a stitch marker and join without twisting yarn.
Row 1 - 7: * k2, p2 * Repeat to end
Row 8 - 26: knit
Row 27: * k2tg, k6 * repeat to end (42 stitches)
(tip: I like to place a stitch marker before I begin each repeat, then I don't have to keep count for the remaining rows)
Row 28: * k2tg, k5 * repeat to end (36 stitches)
Row 29: * k2tg, k4 * repeat to end (30 stitches)
Row 30: * k2tg, k3 * repeat to end (24 stitches)
Row 31: * k2tg, k2 * repeat to end (18 stitches)
Row 32: * k2tg, k1 * repeat to end (12 stitches)

Cut yarn long enough to thread through remaining loops on on hook, pull tight and weave in ends.

Decreasing quickly with out a knit all row in between decreases makes the hat have a flatter top, a little more boyish looking I think.

Ok Here is my first attempt at a knitting chart - click on it to view larger

What I've been up too


Butterfly Hat for my beautiful little girl


Bunny Blanket Friend for a gift - free pattern from Lion Brand Yarn.


Camo infant hat also for a gift.

I've also hatched out 9 baby chicks in my incubator. I have some duck and guinea eggs that if all goes well will hatch out this week as well. I can't wait I've never hatched duck eggs before.


Saturday, April 9, 2011

Rose Headband & Hat

Here is the rose bud headband I talked about last weekend. I just love it. So cute and it will match her Easter outfit. Hopefully that will still fit her. She is growing like a weed.

I also made a newborn boy hat for a gift. I used two strands of yarn, one blue and one green. Part way through to make a stripe I did two strands of blue for three rows.
Wash cloth and the other hat I started are still not finished. I decided I had better work on my taxes before I spend any more time knitting.

Sunday, April 3, 2011

Off to work I go

Tomorrow is my first day back to work after my maternity leave. Luckily I'm only working part time, for the first three weeks my day care only had two days a week available, YEAH! Then in three weeks I start three days a week. Hopefully my little girl has a better day then I think she will have. So far she cries at everyone but James and myself. She even cries at Dad, Grandma and Grandpa. I guess she'll make those ladies at daycare earn their money tomorrow. I feel bad for all of them but especially my little girl.

Over the past few days I tried to get a few more projects in. I made a hat like I made for my little girl for Aunt Tammy to give as a gift along with a couple of headbands. I also knit my little girl a rose headband. I knit a little green and blue hat for gift to give as well. And last night I started on a knit dish cloth. But I didn't finish so hopefully it doesn't sit in limbo too long.

I'll try and take some pictures soon, and post them.

Thursday, March 17, 2011

Easter Hat

My little girl keeps growing and growing, so it was time for a new hat. Yesterday I crochet this hat and added one of my knitted roses on the brim. She tested it out on her first stroller ride around the farm.

I started off looking on the web for a lacy type pattern. I found http://thedaintydaisyblog.blogspot.com/2010/04/shell-stitch-beanie.html . So I used the shell stitch pattern I wanted a tighter hat, not so stretchy so it just sits on her head rather than tight like a stocking hat. I used Caron Simply Soft Yarn and a Size G hook. I started off with a I think you call it a magic loop. Wrap the yarn twice around a few fingers, chain stitch through and around the two strands of yarn. Then I did 6 single crochet next to each other on the loop. Next pull the one loop and shortens the other loop. Pull it tight. Then pull the end of the yarn to tighten the second loop. I like starting this way because I always end up with a small hole in the center when I start making stitches in the first chain. Then I followed her pattern of increases. I went one row further since I was working tighter. I decided to add two rows of single crochets with out any increases before I started the shell stitch. Then I started the shell stitch pattern, followed pretty closely to Dainty Daisy's pattern. When I got to the bottom it says to do three rows of single crochet. I did two rows and then to add a brim I did a row of half double crochet. My next row again half double crochets but instead of a normal stitch, I did them around the post of the stitch. Doing this makes these stitches stand out to the side. For my final row I did two half double crochets in to each single stitch place. This gave it a nice wavy edge. To finish it off I added one of my knit rose buds which I just love.  With making all these changes in gauge and the pattern I'm pleasantly surprised it turned out to be just the size I was hoping for.

I'm thinking of adding little ear flaps, to help with the wind. But maybe I'll just do another hat.

Monday, March 14, 2011

Headband

I took the simple lacy look dishcloth pattern and used it as a headband. I used half double crochets for first and third row instead of double crochets to make it a little thinner. I also used a lot thinner yarn. I still used cotton but went down to a size 10 cotton thread and size F hook.

chain 61 loosely

Row 1: half double crochet in in chain 59 and all the way across. You end up with 60 stitches counting your turning chain. Depending on your gauge you may need more or less stitches, just make sure to keep an even number. Chain 3 and turn.

Row 2: *Skip one stitch and Double crochet into the next stitch. Double crochet back into the skipped stitch going behind the previous stitch (X stitch) * (repeat between *'s until one stitch left) One Double Crochet. Chain 2 and turn.

Row 3: Half Double Crochet to the end.

Hold both ends together forming the headband and slip stitch through the end stitches in all three rows. It works best to "split" the stitch rather than going in the space. You end up with a finer seam. Pull end through and weave in ends.

I tied on a flower I made over the seam, knotted the yarn but kept the ends long. The headband ended up being a little loose for the big flower. So I threaded the tail of the flower around an X stitch on each side of the seam. Gathered the headband up and tied the tail into a bow which is hidden behind the flower. This way I can let the gather out as my baby girl grows.

Feel free to post pictures of the items you made from my pattern and link back to my blog for the pattern. Please don't copy my patterns to your website or blog, please post a link back to mine. If you have any questions just drop me a note. And please let me know how my patterns work out for you. I love to see pictures. This pattern is my personal pattern and I do not give permission to sell anything you make from my pattern. It is for your personal use only.


Copyright 2011 Dana J White